

 See An Gurux for an overview.
Join the Gurux Community or follow @Gurux for project updates.
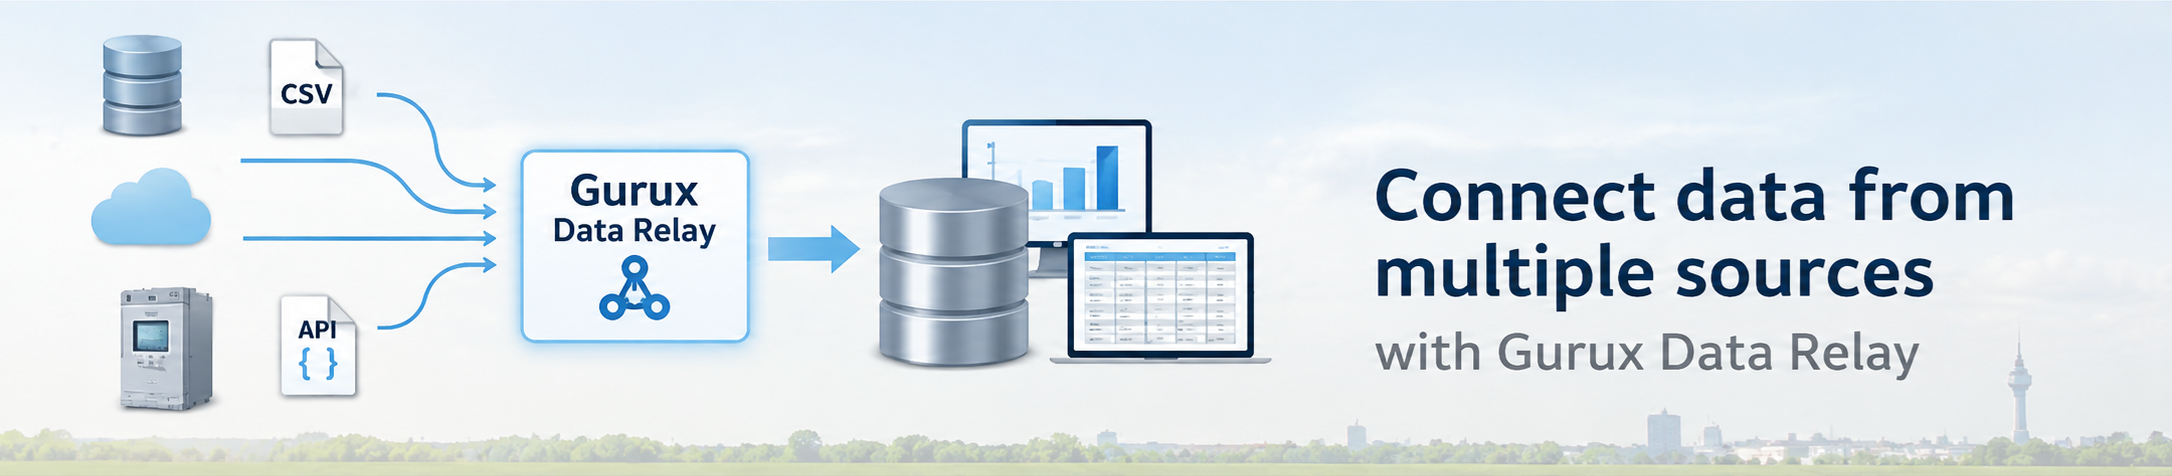
The Gurux Data Relay manages data transmission, reception, and Data Vault processing.
For more info check out Gurux.Data.Relay. We are updating documentation on Gurux web page.
Introduction
Gurux Data Relay transfers data from source databases to a receiving server over TCP or MQTT and can process it into a Data Vault warehouse. Use it to collect data from multiple sites or applications in one central database, integrate operational systems, or prepare data for reporting and analytics. The web interface lets you configure database connections, table mappings, transfer schedules, and Data Vault processing.
Database
At the moment Gurux.Data.Relay is supporting the following databases:
Docker
Install Docker Desktop or Docker Engine and start Docker. On Windows, use Linux containers.
The image is available on Docker Hub. Choose a published tag from the Tags page and replace IMAGE_TAG in both commands below with that tag.
Download the image:
docker pull guruxorg/gurux-data-relay:IMAGE_TAGStart Gurux.Data.Relay in the background:
docker run -d --name gurux-data-relay --restart unless-stopped -p 8080:8080 -v gurux-data-relay-data:/data guruxorg/gurux-data-relay:IMAGE_TAGOpen http://localhost:8080 in your browser. The gurux-data-relay-data volume stores the configuration settings and the default configuration database in /data, preserving them when the container is replaced.
If you configure an incoming TCP transport, publish its listening port as well. For example, add -p 5000:5000 to docker run when the transport listens on port 5000.
View the container logs:
docker logs -f gurux-data-relayStop the container or start it again with its existing settings:
docker stop gurux-data-relay
docker start gurux-data-relay
See the Docker documentation for pulling images and running containers.
Quick start
Configure the receiving Server first, then connect the Client and send the source database schema.
- Set the Server database. Open Server > Databases and add the destination database where received data will be stored. Set the database type and connection string, save the settings, and test the database connection.
- Configure the receiving transport. Open Server > Transports and add a transport for incoming data. Select TCP or MQTT and configure the listening port or MQTT connection settings. Configure the table mappings to use the destination database and save the settings. Make sure the Server is running and ready to receive connections.
- Select the Client database. Open Client > Databases and add the source database from which data will be read. Set the database type and connection string, save the settings, and test the database connection.
- Configure the Client transport. Open Client > Transports and add a transport that connects to the Server. Match the Server’s transport settings, including the address, port, and any required authentication or MQTT topics. Select the source database and tables to transfer, then save the settings.
- Test the Server connection. In the Client transport’s action menu, select Test server connection. Confirm that the connection succeeds before continuing.
- Send the schema. Open the Client settings and select Send schema to send the Client database schema to the Server.
- Or just use AI to do this AI Agents and MCP.
Ideas and discussions
If you have problems or ideas you can ask your questions in Gurux Forum. Please, create a new topic when you have a new question.
This is the best place for bringing opinions and contributions.
Web Client UI
This guide describes the views and settings available in the user interface.
The help icon opens the section for the active page or editor tab. The navigation menu opens the corresponding page; table action menus use that page’s help topic. Closing an editor restores the page’s help topic.
Help topics
| Page or menu | Help section |
|---|---|
| Overview | Web Client UI |
| Databases | Database catalog, Data, Diagram |
| Client | Tables, Transports, State, Log, Settings |
| Client table editor | Table, Tracking, Schedule |
| Transport editor | Connection, Transfer and tables, Server table mappings |
| Server | Transports, State, Log, Settings |
| Data Vault | Model, State, Log, Settings |
| Data Vault editors | Add Stage, Add Hub, Add Link, Add Satellite, Add Reference, Add Mart, Schedules |
| Settings | Configuration database, Import / Export, Automatic column mappings |
| CORS settings | Client, Server, Data Vault |
| Update | Software updates, Configuration table updates |
| Agent | AI Agents and MCP |
Select Client, Server, or Data Vault from the navigation menu. The modes select databases by ID from one shared catalog. Tables, mappings, transports and runtime state remain mode-specific.
Import and export all settings
Open /settings and select Export all settings to download Gurux.Data.Relay.settings.json. The versioned JSON contains client, server and datavault sections, including databases, tables, transports, mappings, schedules, CORS options and credentials. Keep the file private.
To restore it, select the JSON file, review the database counts, then select Import all settings. All three modes are replaced in one transaction; a failed import rolls back the changes. Entity IDs and references are preserved. The configuration-store connection, database contents and runtime history are not transferred. The import file limit is 10 MB.
API: GET /api/settings/archive/export and POST /api/settings/archive/import (application/json).
Databases
Address: /databases, above Client in the navigation menu. Add and edit database names, types, connection strings and record-source defaults here. Test connections and open schema diagrams from this page. A database cannot be deleted while a mode uses it.
Select catalog entries on the Databases tab of Client, Server or Data Vault. Mode settings and exports contain database IDs with their mode-specific tables and mappings. Shared connection definitions are managed only in the catalog. Full archives use format version 2 and contain the catalog once. Legacy mode-owned database schemas and version-1 archives are not supported; use a new configuration store for this version.
On /settings, select one configuration database using the radio buttons, or enter a connection string directly. Save persists the database type and connection string to the application’s settings file. Switching the configuration store does not copy the old store’s settings or catalog; use a format-2 full archive to transfer them when needed.
Database data
Address: /databases/data, or Data in a table’s action menu on the Databases page.
Select a database and table to browse paginated rows and filter columns. The Export menu action prepares a JSON download. To import, select a CSV or JSON file and use Import CSV or Import JSON. For CSV, choose the delimiter and whether the file contains a header row. Check the destination table before importing.
Database diagram
Open Diagram in a database’s action menu. The diagram shows its tables and relationships. Use Back to databases to return to the catalog. On the Databases page, the table action menu also provides Describe to inspect columns and keys, and Data to browse rows.
The database action menu includes Edit, Import schema and Export schema, and Delete.
Database schema import and export
Select Import schema or Export schema in a database’s action menu. Select the tables to include; for import, first choose the schema JSON file and review the table selection. Schema import/export transfers structure; use Database data for row data.
Client
See the Client help topics for links to each tab and editor.
The Client reads tables from source databases and sends their data to the receiving server using the configured transports.
Databases – Source Databases
Address: /client/databases.
Select source databases from the shared catalog and choose Save selection. Manage connection settings on /databases. Remove configured tables and transport routes before deselecting a database.
Tables – Tables to Transfer
Address: /client/tables.
Select a database. Configured tables displays the configured tables, their schedule type, and the last and next transfer times. A new source table can be selected from the Source tables list. Click the table name to edit its configuration.
Table
- Name / table name: The source table to transfer.
- Transfer: Selects the columns to send. Select all columns selects all columns.
- Key: Selects the key columns used to identify a row.
Tracking
Record source: Set a default in the client database editor, or override it in a table’s Tracking tab. An empty table value inherits the database default. The client sends the value as message metadata; the receiver writes it to RECORD_SOURCE on inserts and updates. The configured value overrides a source row’s value for that column. If neither setting is supplied, existing behavior is preserved. The maximum length is 255 characters.
New destination tables include this column automatically when record source is configured. Existing destination tables must have a nullable string column named RECORD_SOURCE with room for 255 characters before enabling the setting. Stage-to-Raw-Vault loads preserve the received value. After upgrading, apply pending configuration table changes from Settings before saving the new settings.
The receiving server stamps LOAD_DATE with its local time on inserts and updates, using one timestamp for all rows in the message. New destination tables include this nullable timestamp column automatically. Add LOAD_DATE to existing Stage tables to enable stamping there. Use a timestamp type with an offset to preserve the server’s time zone. Stage-to-Raw-Vault loads preserve the received timestamp.
| Setting | Description |
|---|---|
| Delete source rows after transfer | Deletes acknowledged source rows after all recipients have accepted the transfer batch. Key columns must be selected. |
| Incremental column | Optional column used for incremental transfers. |
| Change tracking: None | No separate change-tracking method is used. |
| Change tracking: LastRow | Tracking is based on the selected Tracking column and the stored progress value. |
| Change tracking: Version | Changes are detected based on the version in the Tracking column. |
| Change tracking: Timestamp | Uses the Created, Updated, and Deleted columns to detect changes. |
Schedule
Schedule defines when transfers are executed. Interval uses an interval specified in seconds, Daily uses a daily time, and Cron uses a cron expression. Manual, Continuous, and DatabaseChange are also available. DatabaseChange behavior depends on the database’s change-notification support. Cron expressions are validated in the editor.
The table action menu contains Edit, Delete, Test server connection, Send Schema, and Describe. Describe displays the columns and keys. Send Schema sends the schema information to the recipient.
Transports – Transfer Connections
Address: /client/transports.
Add, edit, or delete a transport. The transport editor contains Connection, Transfer, and Tables settings.
Tables lists the physical source tables from each database as well as already configured tables. When a selected table has no client settings yet, saving the transport adds its columns and primary keys with a manual schedule. Existing table settings are preserved, and unselected source tables are not added to the configuration.
Transport connection
| Setting | Description |
|---|---|
| Description | Description of the transport. |
| Type | TCP or MQTT transport. |
| Host, Port | Address and port of the TCP recipient. |
| Connect timeout | Timeout for establishing the TCP connection. |
| Acknowledgement timeout | Time to wait for an acknowledgement from the recipient. |
| Broker, Port | Address and port of the MQTT broker. |
| Topic | MQTT message topic. |
| Acknowledgement topic | MQTT acknowledgement topic. |
| Username, Password | MQTT authentication credentials. When editing, leaving the password field empty keeps the existing password. |
| Use TLS | Enables TLS encryption for the MQTT connection. |
| Maximum message size | Limits the message size. |
Transfer and Tables
| Setting | Description |
|---|---|
| Batch size | Number of rows processed in a single transfer batch. |
| Retry count | Number of retries after a failed attempt. |
| Retry delay | Delay between retry attempts. |
| Ping after | Interval for checking the connection. |
| Allow concurrent runs | Allows concurrent executions. |
| Tables | Selects the tables from each database that are sent through this transport. |
Save the transport for the table selections to take effect.
Data – Source Table Data
Address: /client/data.
Select a database and table. The view displays columns and paginated rows, which can be filtered using column-specific search fields.
Import CSV / JSON imports a file into the selected table. For CSV imports, select the delimiter and specify whether the first row contains headers. Verify the destination database and table before importing.
State – Transfer State
Address: /client/state.
The database selection filters the table state information. Table state includes information such as the last successful transfer, last attempt time, row count, checkpoint, last error, consecutive failures, and execution duration.
Reset transfer checkpoint resets the progress position of the selected table. The next execution may resend rows that have already been transferred; other transfer history is preserved.
Log – Client Log
Address: /client/log.
The list displays the time, database, Level, Source, Message, and Exception/Error. The database selection filters events by database. Minimum level selects the lowest log level to display. The Source, Message, and Exception/Error search fields filter events by text. Open a message to view detailed event information.
Clean opens the event deletion confirmation. Review the scope shown in the confirmation before accepting it: log-level and text-field filters do not restrict which events are deleted.
Settings – Client Settings
Address: /client/overview.
The JSON editor displays the Client settings. Save saves the settings, Export settings creates a downloadable settings file, and Import settings imports settings from a file. Preserve existing identifiers and concurrency information when editing existing configurations.
| Setting | Description |
|---|---|
| Databases | Source databases, tables, and their settings. |
| Transports | Transfer connections and table mappings. |
| EventLogLevel | Minimum level of application events to store. This is not the search filter used in the Log view. |
| CommunicationLogLevel | Minimum level of communication events to store. |
| RestEnabled | Availability of the mode’s REST interface and the UI that uses it. |
| SwaggerEnabled | Controls whether the mode is included in the API documentation. |
| CorsEnabled, CorsAllowedOrigins, CorsAllowCredentials | Settings for allowed browser origins and requests containing credentials. |
Client settings also contain Reset client state and Send schema. Reset client state resets transfer-state information. To reset an individual table, use the State view.
Server
The Server receives data sent by Clients and writes it to the configured destination databases.
Databases – Destination Databases
Address: /server/databases.
Add receiving databases. Database type, Description, Connection string, connection tests, and Diagram work in the same way as on the Client. Server database settings also include:
| Setting | Description |
|---|---|
| Delete mode | Defines how deletions are handled at the destination. PhysicalDelete removes the row, while SoftDelete uses a deletion marker. |
| Deleted column | The deletion-marker column used by SoftDelete mode. |
Transports – Receiving and Table Mappings
Address: /server/transports.
Add a receiving transport and select TCP or MQTT. For a TCP transport, specify the listening port. For MQTT, configure the broker, port, message and acknowledgement topics, authentication, and TLS when required. Maximum message size limits the size of messages.
Table mappings maps incoming tables to their destinations:
| Setting | Description |
|---|---|
| Source table name | Table name used in the sender’s message. |
| Destination database | Destination database from the Server database list. |
| Destination table | Table where incoming rows are written. |
Add mapping adds a mapping. Apply mapping applies it to the editor; also save the transport to persist the change. Mappings and transports can be edited or deleted.
Data – Received Data
Address: /server/data.
Select a database and table to view the destination rows. Column filters and pagination make it easier to inspect received data. Unlike the Client Data view, the Server Data view does not provide CSV/JSON import.
State – Receiving State
Address: /server/state.
Displays table mappings and processed messages. For each message, you can inspect its identifier, processing time, status, and possible error. Use this information to verify successful reception and troubleshoot problems.
Log – Server Log
Address: /server/log.
Displays the Server log. Database, minimum-level, and text filters, as well as opening event details, work in the same way as in the Client Log view. Text searches and log-level filters in the Clean operation do not restrict the events being deleted.
Settings – Server Settings
Address: /server/overview.
The JSON editor manages Server databases, receiving transports, and their mappings. Save, Discard changes, Export settings, and Import settings work in the same way as on the Client. EventLogLevel, CommunicationLogLevel, REST, Swagger, and CORS settings apply specifically to Server mode.
Data Vault
Data Vault creates and maintains data warehouse tables based on source tables, column mappings, and schedules.
Databases – Data Warehouse Databases
Address: /datavault/databases.
Add databases used for Data Vault processing and configure their type, description, and connection string. Connection tests, type and description filtering, editing, deletion, and database diagrams are available.
Model – Data Warehouse Model
Address: /datavault/model.
Select a database. The Mappings list displays the object type, source, target, and schedule. The list can be filtered using these fields. Mapping details for the selected configuration displays the column mappings.
Start executes the selected configuration, Edit modifies it, and Delete removes it.
Tables and Mappings
See Add Stage to register an existing Stage table and configure its processing schedule.
| Setting or object | Description |
|---|---|
| Object type | Role of the configuration in the data warehouse, for example Staging, Hub, Link, Satellite, or InformationMart. |
| Source table | Source table to read. |
| Target table / Target table name | Processing destination or name of the table to create. |
| Business Key | Business key of the Hub. |
| Parent table | Referenced Hub or another parent table allowed by the editor. |
| Source key column | Source column used to create the reference key. |
| Target hash column | Target reference-key column, for example HK_role. |
| Code column | Key column of a code table when used by the selected type. |
| Source column, Target column | Mapping between a source and destination column. |
| Role | Role of the column in the data warehouse configuration. |
| Add mapping | Creates a processing configuration when the table is created. |
Hub, Link, Satellite, Reference and Mart dialogs include Create new table. When selected, enter Target table name. When cleared, select the existing Target table and its destination columns from searchable dropdown lists. Changing the destination clears previous column selections. All required roles must map to distinct writable columns; the server checks the table and column compatibility again before saving. Existing-table mode saves a mapping without changing the table structure or its rows. If the table is missing, select another table or choose Create new table.
Add Stage
On Data Vault → Model, select a configured database and choose Add Stage from the top menu. The dialog registers an existing Stage table and its processing schedule; it does not create a new physical table.
- Select Stage database. It initially uses the database selected in the Model view.
- Select Stage table from that database. Changing the database reloads the available tables.
- Choose Schedule. For Interval, enter the interval; for Cron, enter a cron expression; for Daily, select the time. Manual runs are started from the Model view.
- Select Save mapping to save. Cancel closes the dialog without saving the draft.
The help icon in the upper-right corner opens this section. The same instructions apply when modifying a Stage schedule. For downstream objects, see Tables and mappings and Data Vault schedules.
Add Hub
On Data Vault → Model, choose Add Hub. Select the Source table, then choose a Business Key that identifies the business entity, such as a customer number.
With Create new table selected, enter Target table name. The dialog shows the business-key and hash-key column names; the new Hub also includes LOAD_DATE and RECORD_SOURCE. Select Create table to complete the operation.
To use an existing Hub, clear Create new table, select Target table, and map each required column to a distinct writable target column. Select Save mapping. Existing-table mode preserves the table structure and rows. Cancel closes the draft without saving.
Add Link
Choose Add Link to describe a relationship between Hubs. Select the Source table and choose whether to create a new target table or use an existing one.
Configure at least two Hub references. For each reference, select Parent table and Source key column. When creating a table, give each Target hash column (HK_role) a distinct role name, such as HK_Customer and HK_Seller. Add further references when the relationship involves more Hubs.
The Link hash key is the primary key. For an existing target, map the required hash keys and metadata columns to distinct writable columns. Finish with Create table or Save mapping; Cancel discards the draft.
Add Satellite
Choose Add Satellite to store descriptive attributes for a Hub or Link. Select the Source table, Parent table, and Source key column, then select the descriptive columns to include. HASH_DIFF tracks changes to those attributes; the primary key consists of the parent hash key and LOAD_DATE.
For a new table, enter Target table name and the parent reference’s Target hash column (HK_role). For an existing table, clear Create new table, select the target, and map the required keys, metadata and descriptive columns. Finish with Create table or Save mapping.
Add Reference
Choose Add Reference for code or lookup data. Select the Source table, choose the Code column used as the primary key, and select at least one descriptive column.
Enter a new Target table name, or clear Create new table and select an existing target. In existing-table mode, map the code, metadata and descriptive columns to distinct writable target columns. Finish with Create table or Save mapping. Cancel discards the draft.
Add Mart
Select a Stage, Hub or Satellite mapping in Data Vault → Model, then choose Add Mart. The dialog displays the source table and available related tables and columns.
- Keep Create new table selected and enter Target table name, or clear it and select an existing target. Existing rows remain until a manual or scheduled refresh.
- If several root Hubs are available, select Root Hub. The result contains one row per root Hub key; Satellites use their current or latest row.
- Select source tables and columns and review each Output column name or existing target-column selection. Required keys remain selected. Show technical columns exposes hash keys, load dates and record sources; Select all columns includes those columns too.
- For columns reached through Links, choose the required Aggregation: Min, Max, Count, CountDistinct or Average.
- Set Refresh schedule to Manual or Interval. For Interval, enter a positive interval in seconds.
- Select Create Mart to create the table or save the mapping for an existing target. Cancel closes the draft without saving.
Each Add dialog has a help icon in its upper-right corner. See Tables and mappings for shared mapping rules and Information Mart for refresh behavior.
Information Mart
In the Information Mart editor, select the destination name, Root Hub when required, tables and columns to include, and names for the result columns. Required keys remain selected. Aggregation defines how a column is aggregated when aggregation is available.
Refresh schedule defines the update schedule, and Interval specifies its interval. Create Mart creates a new Mart; existing-table mode saves its mapping. Existing Mart rows are preserved until a manual or scheduled refresh. For an existing mapping-based Mart, Refresh Mart refreshes its data.
Data Vault schedules
The mapping’s Schedule selects the execution method. Depending on the type, the editor accepts an Interval, Cron expression, or Time. Information Mart uses its own Refresh schedule setting. Select a schedule based on the source update frequency and processing requirements.
Data – Data Warehouse Content
Address: /datavault/data.
Select a database and table to browse rows and apply column-specific filters. CSV/JSON import is available for Staging destinations. For CSV imports, configure the delimiter and whether the first row contains headers.
State – Processing State
Address: /datavault/state.
Displays the mapping’s database, type, source, target, and state. It also shows the times of the last start, completion, and successful execution, as well as the row count, duration, and possible error. Use this information to monitor scheduled processing and locate failed operations.
Log – Data Vault Log
Address: /datavault/log.
Displays Data Vault logs. Filter the view by database, Minimum level, or the Source, Message, and Exception/Error search fields. Open a message to view its details.
Clean opens the deletion confirmation. Text searches and log-level filters do not restrict which events are deleted.
Settings – Data Vault Settings
Address: /datavault/overview.
The JSON editor manages Data Vault databases and mappings. Save saves the settings, Discard changes restores the saved values, and Export settings / Import settings transfer settings using a file.
The minimum logging levels and REST, Swagger, and CORS settings work per mode in the same way as for Client and Server.
The application’s shared Settings page separately defines the database type and connection string used to store configuration data. Test tests the connection and Save saves the setting.
The Update page checks for software releases and updates the configuration database table structures.
These shared pages do not change the connection of an individual Client, Server, or Data Vault database.
Settings – Automatic column mappings
On /settings, use Automatic column mappings to add rules or choose Edit or Remove from the row context menu.
Adding and editing opens a dialog; OK saves the change immediately. Removing a rule also saves immediately.
Data Vault table dialogs load these rules when opened. Rules ignore letter case and work in both directions.
For example, *HashKey and HK_* match CompanyHashKey with HK_Company.
Each name can contain at most one *; when both names contain it, the matching text is preserved.
Exact column names and manual selections take precedence. Ambiguous matches require a manual selection.
The rules are stored with Data Vault settings and included in settings export/import. Removing every rule disables alias suggestions.
Shared settings
Open Settings in the navigation menu (/settings, also available as /store-settings). Each tab has its own help topic.
Configuration database
Select the database used to store relay configuration, or enter its database type and connection string. Test verifies connectivity; Save persists the configuration-store selection. This does not change the source or destination database connections in the catalog. Switching stores does not copy settings; use Import / Export to transfer a full archive.
Client CORS
On Settings, select Client CORS to configure browser access to the Client API. Enable CORS, enter one allowed origin per line, and choose whether credentials are allowed. Origins contain the scheme, host and optional port, without a path or trailing slash. Select Save CORS settings to apply changes. A wildcard origin is only suitable when credentials are disabled.
Server CORS
Select Server CORS to configure browser access to the Server API. The controls work as described in Client CORS, but save to Server settings independently.
Data Vault CORS
Select Data Vault CORS to configure browser access to the Data Vault API. The controls work as described in Client CORS, but save to Data Vault settings independently.
Software updates
Open Update (/update) to view the installed software version, the latest release, and the last successful check. Check for updates starts a new check; View release and downloads opens the GitHub release page. A notification appears above the page content when a newer version is available. Updates are not installed automatically.
The server uses the Gurux.Updater.Net NuGet package to check Gurux/Gurux.Data.Relay GitHub releases at startup and every six hours. Browsers refresh the shared result every minute. Failed checks show a warning on the Update page and retain the last successful result. The installed version comes from the web server assembly’s informational version; release builds should set Version to match their release tag (for example, dotnet publish -p:Version=1.2.3).
API: GET /api/update/software returns cached status; POST /api/update/software/check checks for a release. These endpoints do not download or install software.
Update configuration tables
Address: /update. The Update navigation item shows a warning badge when configuration table changes are pending. Review the listed tables and changes, then select Update tables. The page reports the result and reloads the pending changes. Apply these updates before saving settings that require the newer configuration schema.
AI Agents and MCP
Gurux Data Relay can expose its functionality through the Model Context Protocol (MCP). An MCP-capable AI agent can discover the available Data Relay tools and use them without knowing the REST API endpoints, database-specific SQL, or the internal configuration format.
Typical agent tasks include:
- Listing configured databases.
- Discovering tables and schemas.
- Creating and updating transfers.
- Running transfers and checking their status.
- Inspecting Data Vault source schemas.
- Proposing simple Data Vault models.
- Validating Data Vault models before they are applied.
The exact MCP transport depends on how Gurux Data Relay is deployed.
For a server installation, configure the agent to connect to the Gurux Data Relay MCP endpoint, for example:
http://localhost:8080/mcpVisual Studio Code
Visual Studio Code can use MCP servers from Agent mode.
For a workspace-specific local MCP server, create:
.vscode/mcp.jsonFor a remote Gurux Data Relay MCP server:
{
  "servers": {
    "gurux-data-relay": {
      "type": "http",
      "url": "http://localhost:8080/mcp"
    }
  }
}
You can also add the server from the VS Code Command Palette:
MCP: Add ServerAfter the MCP server is configured:
- Open the Chat view.
- Select Agent mode.
- Verify that the Gurux Data Relay MCP tools are available.
- Ask the agent to perform a Data Relay operation.
Example prompts:
Show all databases configured in Gurux Data Relay.Show the tables in the ProductionMySQL database.Create a transfer of the Customer table from ProductionMySQL to PostgreSQL
and run it every 15 minutes.Check the status of the last Customer transfer.Add a Gurux Data Relay server TCP transport that listens on port 1000.\
Use the existing Test database configuration and map the incoming source table Customer to the destination table STG_Customer.\
Verify that the transport is configured correctly and ready to receive data.Add a Gurux Data Relay client that reads the Customer table and sends its contents to the server at localhost:1000 over TCP once every minute.\
Use the existing database configuration and verify that the client’s transfer interval is set to 60 seconds.
Build a Data Vault model from STG_Customer, then use that model to populate MART_Customer_DV.
- Read Mart data through Hubs, Links, Satellites, and Reference tables.
- Include only these output columns: CustomerId, CustomerNumber, CustomerName, Email, CompanyNumber, CompanyName, CountryCode, CountryName.
- Use hash keys internally for joins. Exclude hash keys and technical metadata from the output.
- Preserve original values without counts or other aggregations.
- Produce one row per customer–company–country combination.
- Add missing fields to both Data Vault mappings and physical tables before building the Mart.
- Back up the existing Mart before changing its structure.
- Populate the Mart and verify that its business columns, values, and row counts match the Stage. Verify that refreshing succeeds without creating duplicate rows.
VS Code may ask for confirmation before invoking MCP tools that modify configuration or data.
Claude Code
Claude Code can connect directly to MCP servers.
For a remote HTTP MCP server, configure the Gurux Data Relay MCP endpoint using the MCP options supported by your installed Claude Code version:
http://localhost:8080/mcpUse:
claude mcp listto verify that the server is configured.
After that, start Claude Code normally:
claudeExample prompts:
Use Gurux Data Relay to list all configured databases.Inspect the Customer table and show its primary key and columns.Create a manual transfer from MySQL.Customer to PostgreSQL.Customer,
but do not run it yet.Analyze Customer, Company and Orders and propose a simple Data Vault model.
Do not apply the model until I approve it.For Data Vault design, the agent should inspect the schema and relationships first, propose Business Keys, Hubs, Links and Satellites, and validate the model before applying it.
Claude Desktop
Claude Desktop can use local MCP servers configured in:
Windows:
%APPDATA%\Claude\claude_desktop_config.jsonmacOS:
~/Library/Application Support/Claude/claude_desktop_config.jsonExample configuration:
{
  "mcpServers": {
    "gurux-data-relay": {
      "command": "C:\\Program Files\\Gurux\\Gurux.Data.Relay.exe",
      "args": [
        "--mcp"
      ]
    }
  }
}
Use an absolute executable path.
After changing the configuration file, completely exit Claude Desktop and start it again.
When the Gurux Data Relay MCP server has been detected, its tools become available to Claude.
Example prompts:
What databases are configured in Gurux Data Relay?Find the Customer table and describe its columns.Create a transfer of Customer from MySQL to PostgreSQL every 15 minutes.Analyze the Customer, Company and Orders tables and suggest a simple
Data Vault 2.0 model. Show the proposal before creating anything.Recommended Agent Workflow
For normal Data Relay configuration, an agent should typically work in this order:
list_databases
      |
      v
list_tables
      |
      v
get_table_schema
      |
      v
create_transfer
      |
      v
run_transfer
      |
      v
get_transfer_status
For Data Vault planning:
list_databases
      |
      v
list_tables
      |
      v
get_table_schema
      |
      +--> get_table_relationships
      |
      +--> get_column_statistics
      |
      +--> get_sample_rows
      |
      v
analyze_data_vault
      |
      v
Agent proposes the model
      |
      v
validate_data_vault_model
      |
      v
User approval
      |
      v
apply_data_vault_model
The agent should not automatically assume that a database primary key is the Data Vault Business Key. For example, an identity column such as Customer.Id can be a technical key while Customer.CustomerNumber is the actual Business Key.
The agent should ask for confirmation when the Business Key or another important semantic decision is ambiguous.
Security
Only connect trusted agents and MCP clients to Gurux Data Relay.
MCP access can expose operations that read database metadata, modify Data Relay configuration, start transfers, or create Data Vault structures.
The MCP interface should follow the same authorization rules as the other Gurux Data Relay interfaces.
MCP tools must not expose:
- Database passwords.
- Connection-string passwords.
- API keys.
- Access tokens.
- Private keys.
- Other secret configuration values.
Prefer read-only discovery and validation tools before tools that modify configuration or database structures.